
Change the reporting period
Choose which days the figures and chart are built from, using the period control to the right of the facility dropdown.
Before you start
Plan: Available on all plans.
- Facility: choose a facility first.
- PRODA: the facility needs PRODA configured and connected.
Choose a period
- To the right of the facility dropdown, click the period control.
- Read the line under each option. It shows how much data that period holds.
- Click the period you want.
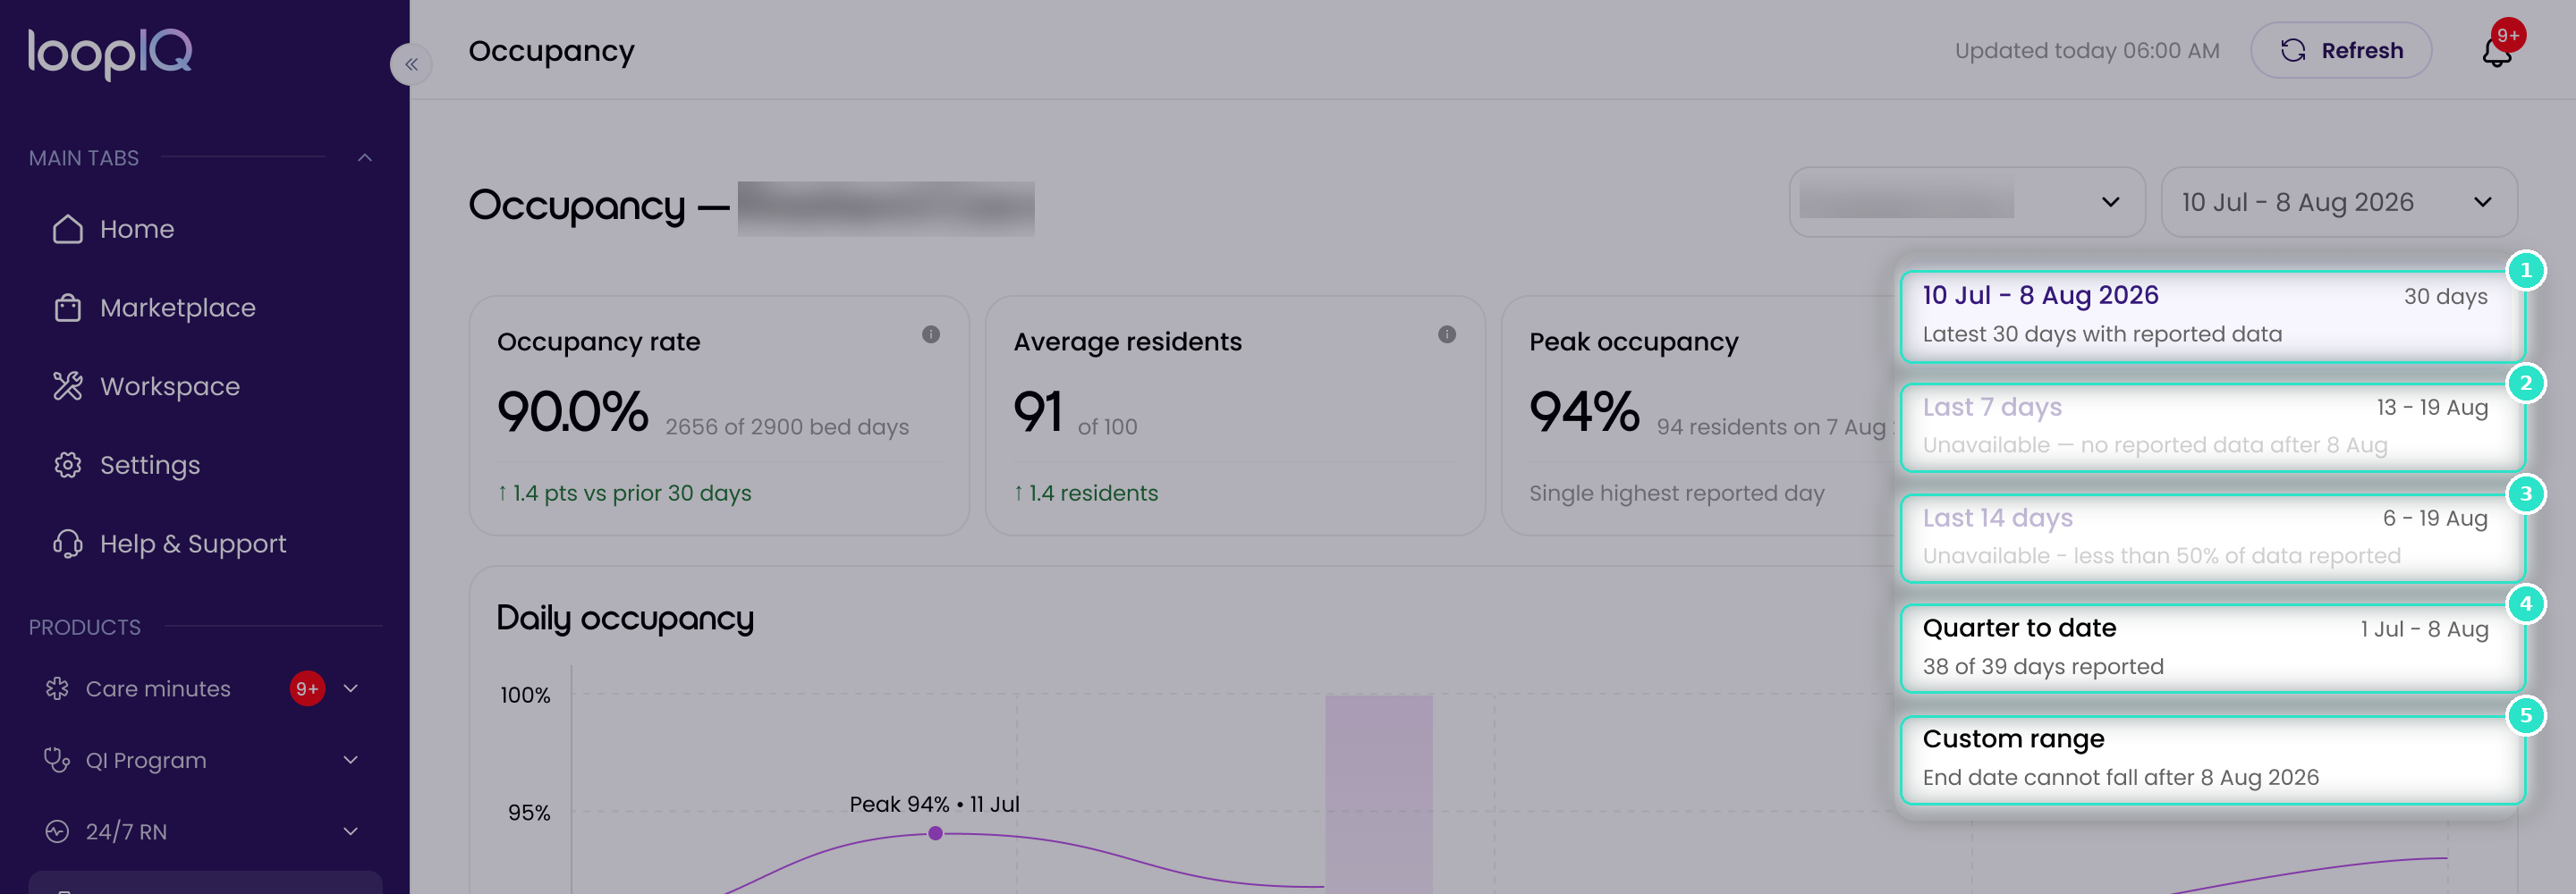
The options are:
- Default period (1): the latest 30 days with reported data, named by its dates.
- Last 7 days (2): the last seven calendar days, counted from today.
- Last 14 days (3): the last fourteen calendar days, counted from today.
- Quarter to date (4): the current quarter, up to the last reported day.
- Custom range (5): any dates you choose.
The figures and chart redraw for the period you chose.
Set a custom range
- Click Custom range (5).
- In the calendar, click the first day you want.
- Click the last day you want.
- Click Apply.
You can't choose a date after the one named under Custom range, because there's no data after it.
Important: A greyed-out period can't be chosen because there’s too little data. See Reporting periods explained.
Was this article helpful?
Can't find what you are looking for?
Loop IQ customers - log a support ticket.
Not yet a customer? Email our support team.
 Log a support ticket
 support@loopiq.com.au