
Create, Edit & Delete Roles
This section covers navigating to Roles, creating a new role, and updating or deleting an existing role.
Go to Roles
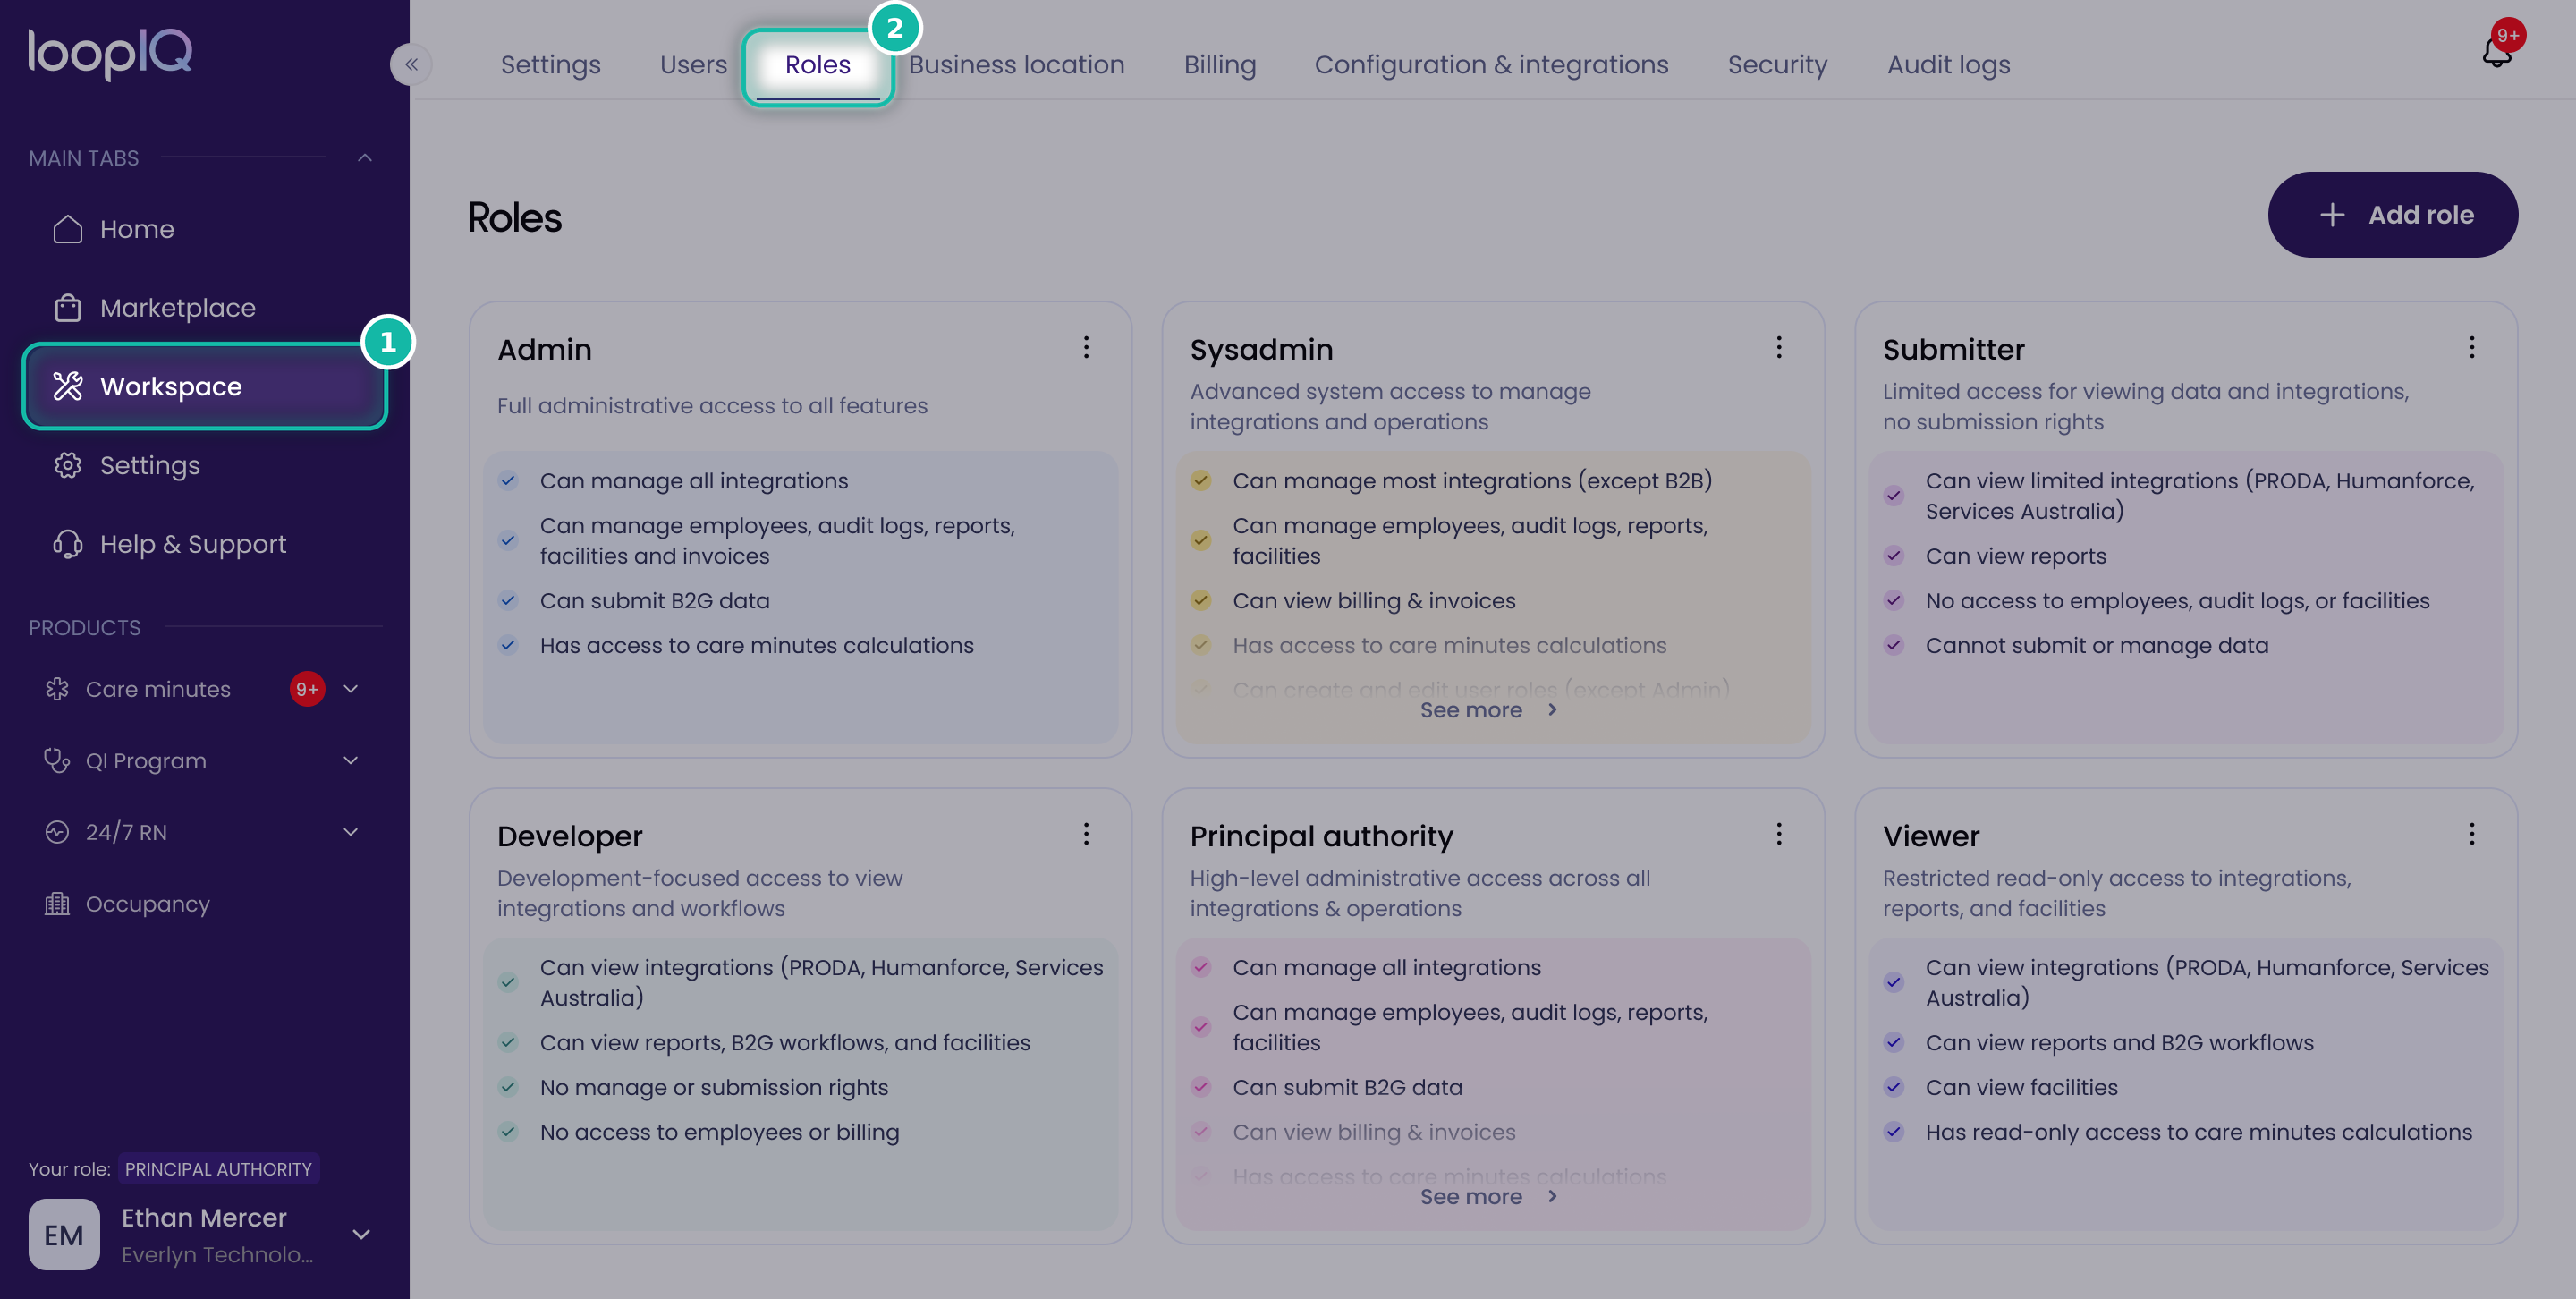
- From the left menu, click Workspace (1).
- Select the Roles tab (2) to see all roles in your workspace.
Create a Role
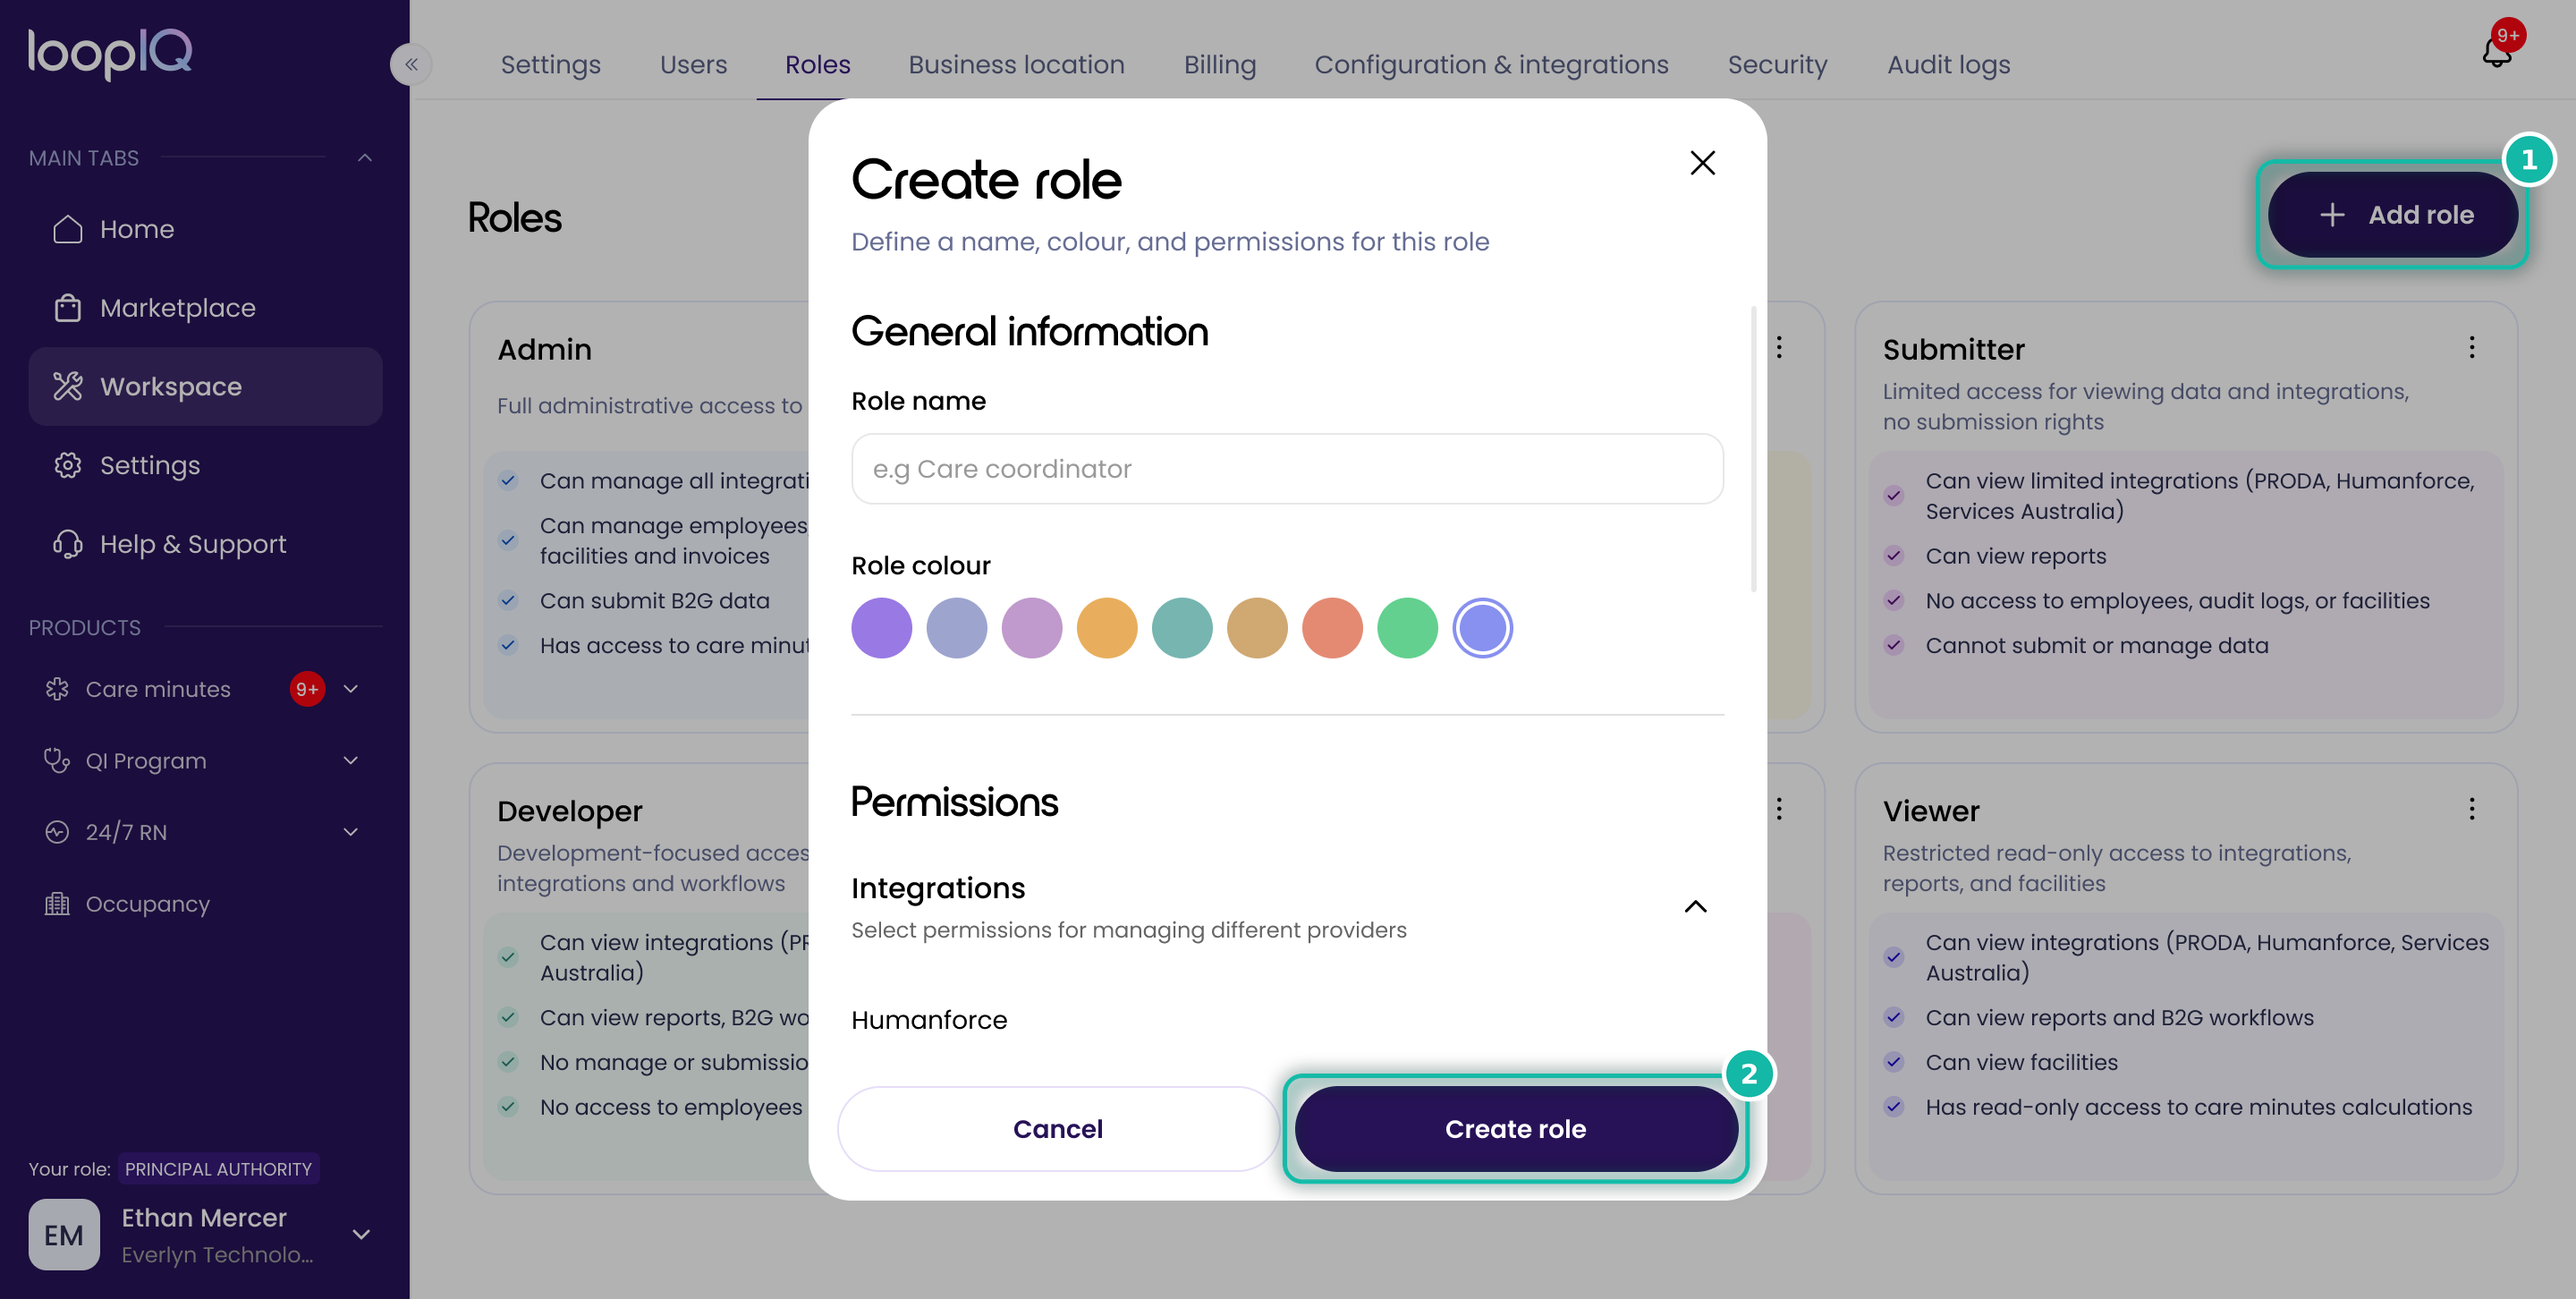
- On the Roles page, click Add role (1).
- Enter a Role name.
- Choose a Role colour.
- Under Permissions, select the access this role needs for each provider.
- Click Create role (2) to save.
The new role will appear in your roles list.
Edit a Role
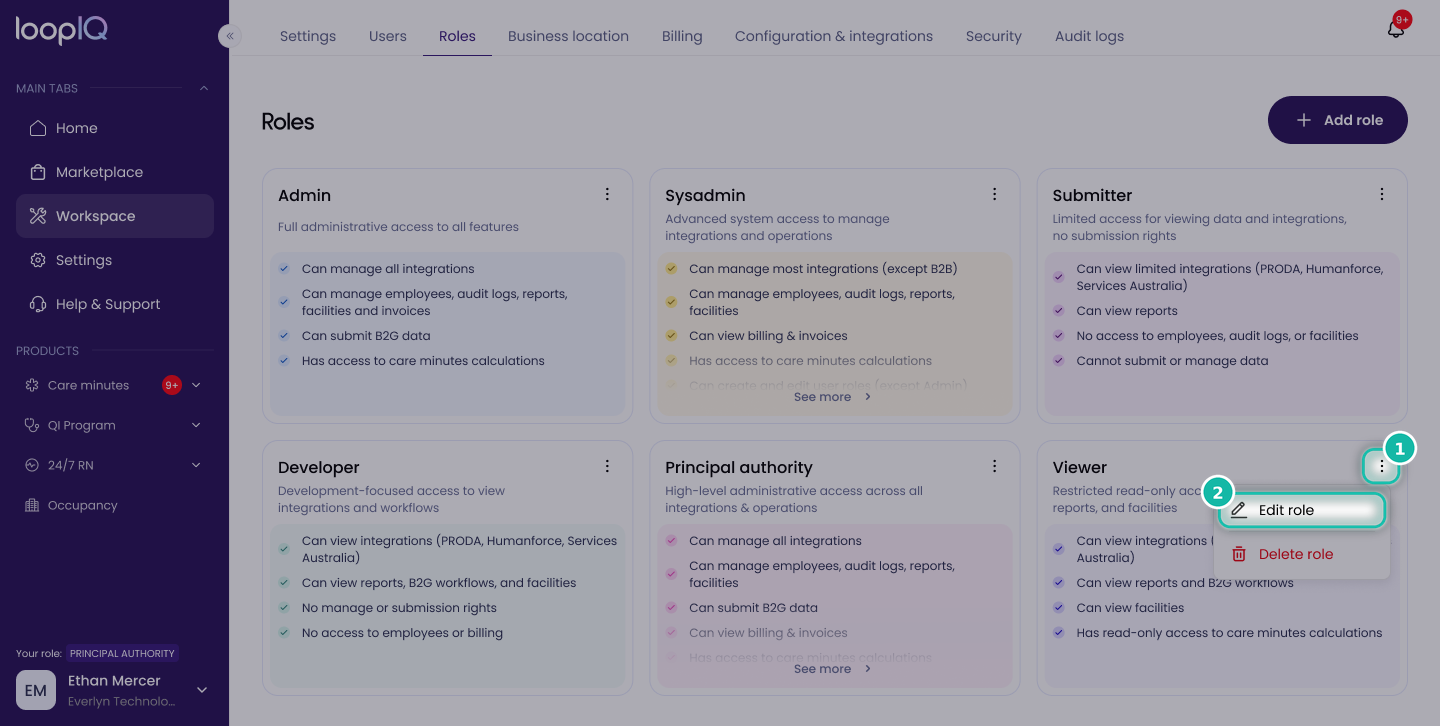
- On the Roles page, click the ⋮ menu on the role you want to change (1).
- Select Edit role (2).
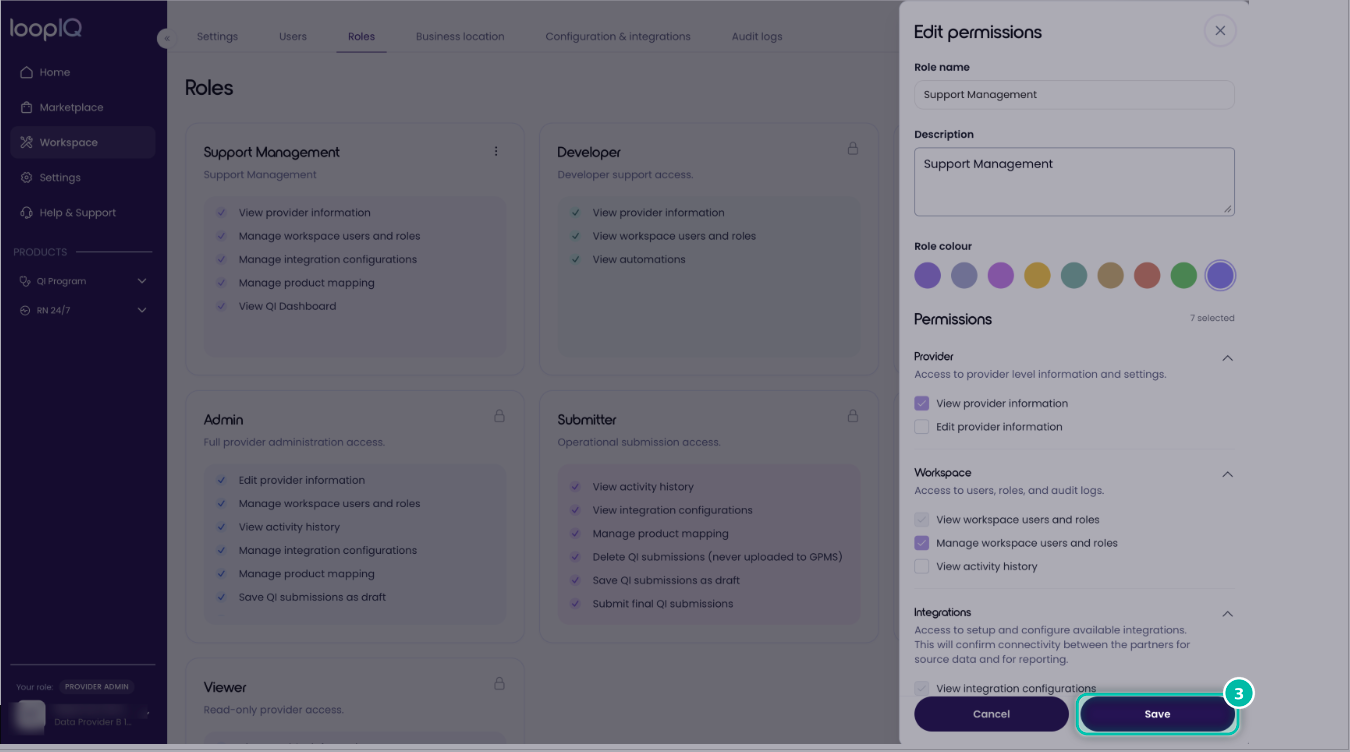
- Update the role name, description, colour or permissions as needed.
- Click Save (3) to apply your changes.
Delete a Role
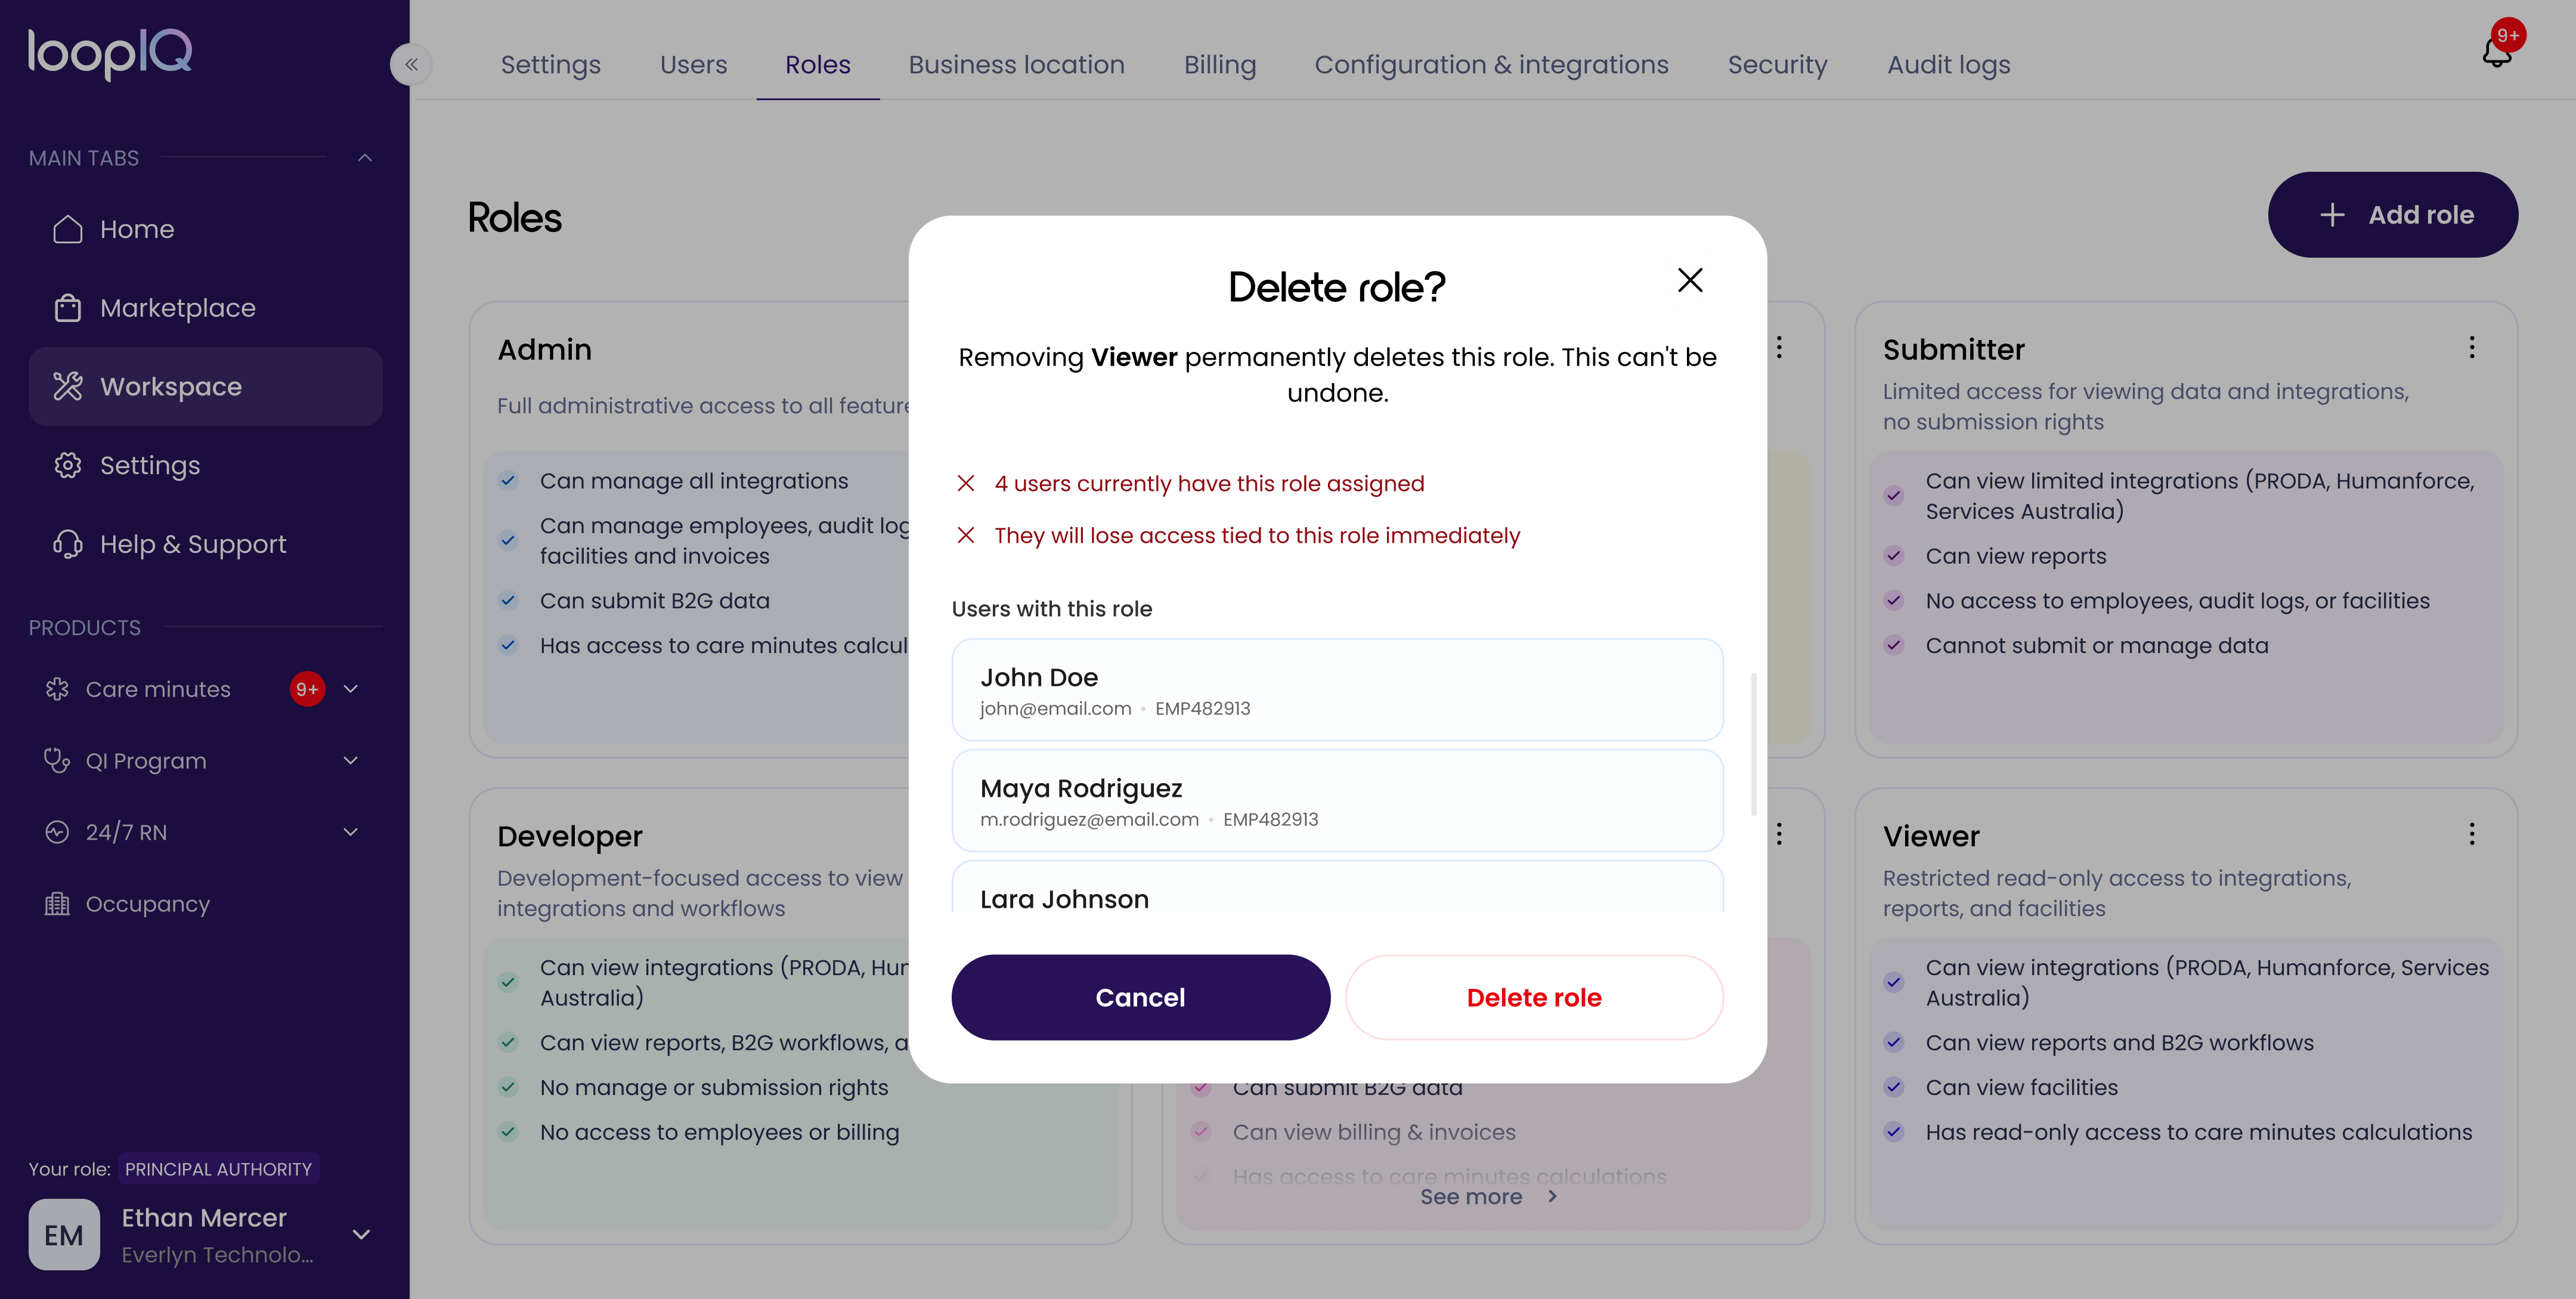
- To remove the role, choose Delete from the three-dot menu.
- The Delete Role pop-up will be displayed.
- Click the Delete button — the role will be removed from the list.
Was this article helpful?
Can't find what you are looking for?
Loop IQ customers - log a support ticket.
Not yet a customer? Email our support team.
 Log a support ticket
 support@loopiq.com.au